Using Carousel Postback
In this tutorial, you will learn how to use the Postback feature of the Carousel Content Type.
The Postback feature of the Carousel allows you to send custom data to the Botpress server when the user clicks on button in the Carousel.
Using a hook, you can make your Botpress server act upon the received data.
Our bot
In this example, we will send a custom payload using the Postback feature. When our chat user clicks on a button in the Carousel, we will send a payload with a city code (mtl or nyc).
We will then create a hook that will save this city code in the memory. The bot will then flow to a particular node, depending on the value in memory.
It's now time to create the bot. Use this link to download the exported bot. Create a new bot using this archive. Your bot should look like this:
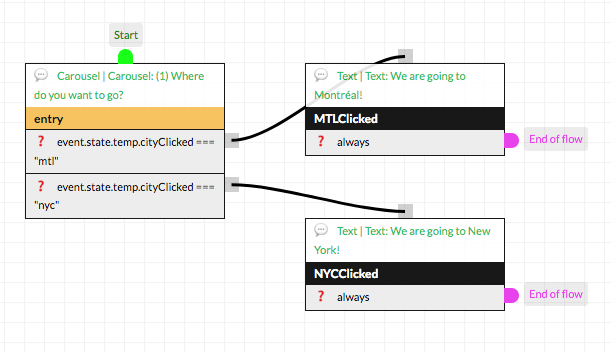
As you can see, the bot wil first display a Carousel, then flow to a different node based on the value of temp.cityClicked. The current transitions do not work yet, let's see the hook.
Implementing the hook
From the Code Editor, create a new hook. This hook will be of category "After Incoming Middleware". You can pick any name for you hook. Paste the following snippet inside your hook file:
function hook(bp: typeof sdk, event: sdk.IO.IncomingEvent) {
  /** Your code starts below */

  async function hook() {
    const backs = ['callback', 'postback']
    if (backs.includes(event.type)) {
      let payload = ''
      switch (event.type) {
        case 'callback': // For Facebook Messenger
          payload = event.payload.text
          break
        case 'postback': // For Web
          payload = event.payload.payload
      }

      switch (payload) {
        case 'mtl':
          event.state.temp.cityClicked = 'mtl'
          break
        case 'nyc':
          event.state.temp.cityClicked = 'nyc'
          break
        default:
          console.log('Unexpected payload')
      }
    }
  }

  return hook()

  /** Your code ends here */
}
Save the hook and open the emulator.
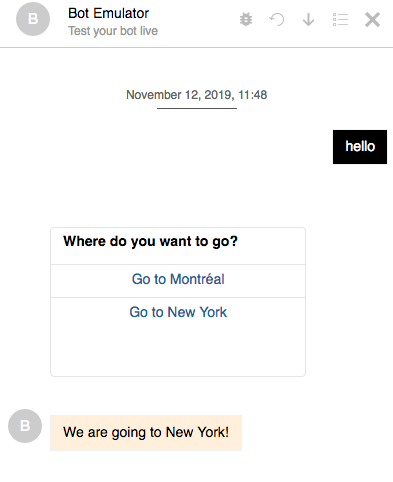
Testing your bot
Summon the bot by sending a quick hello message. The bot will display the carousel. Click on a button of the carousel. The bot's response will vary based on the button that was clicked: