Calling an API in a Custom Action
Overview
One of the most popular use-case for Actions is to call an API, get some data and use it in your flow. That's what we're going to demonstrate here.
In this tutorial, we're going to fetch the list of Botpress repositories on Github and display the description of the first one. This will show you how to call an API, save the response and use the response in a content element by using templating.
Create an action
We're going to use axios as http client because its already a Botpress dependency. See our Custom Code section to learn more about how dependencies work in Actions.
Start by creating a new javascript file in /data/global/actions/callApi.js. Then copy the following code:
const axios = require('axios')

/**
 * @title Call the Github API to fetch Botpress repositories
 * @category Turorial
 * @author Botpress, Inc.
 */
const callApi = async () => {
  // We call the Github API
  const { data } = await axios.get('https://api.github.com/orgs/botpress/repos')

  // We assign the response to the session variable so we can use it later
  session.response = data
}

// Actions are async, so make sure to return a promise
return callApi()
📖 What is the
sessionvariable? Learn how to use Memory to store data.
Create a node
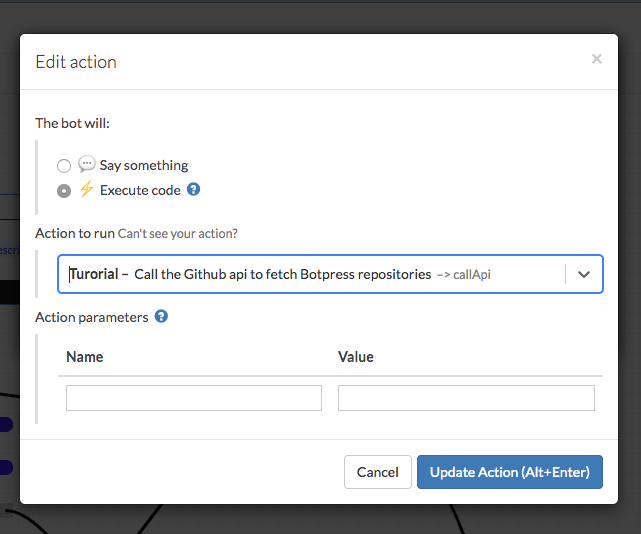
Select your action
Add an onEnter action instruction and select the callApi action from the list:
📖 What are
onEnterinstructions? Understand how the node Lifecycle works.
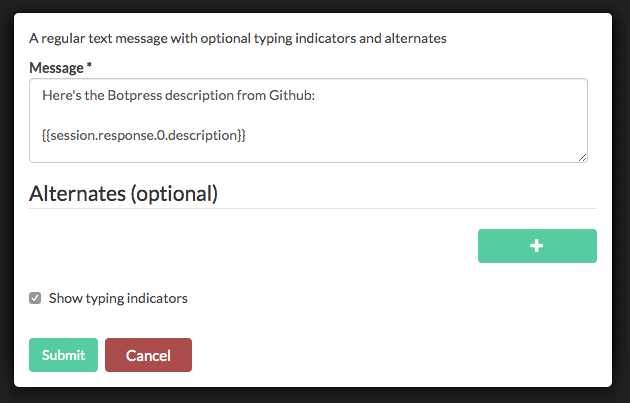
Add a text content element
Create another onEnter instruction to make your bot say something. Once the first instruction is executed, the response will be stored in the session variable.
Here we use templating to get the description of the first repository from the list:
📖 What is this templating thing? Take a look at the Mustache demo to understand how templating works in Botpress.
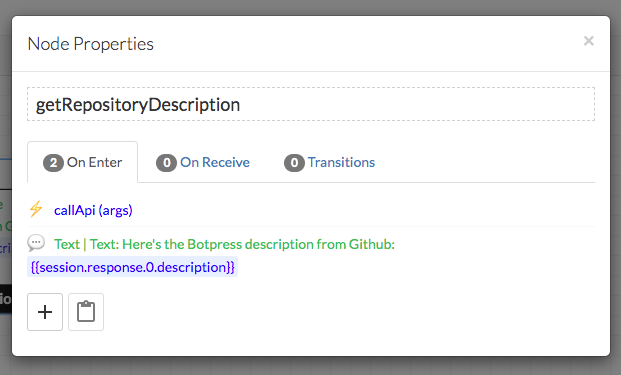
Once everything is done, this is what your node should looks like:
Try it out!
The next time you chat with the bot, it will reply with the description of the Botpress repository:
